CompassAir Web Basic User Guide


Mobile App

CompassAir is an intelligent messaging application for ship owners, managers and shipbroking companies that is designed to run on most modern smartphones and tablets that are running iOS and Android operating systems.

CompassAir can only be operated if the user has access to an operational CompassAir server with a valid username and password.

1      MESSAGES

1. Views/Settings etc: tap to reveal menu (see 3 VIEWS below)

2. Current view (see 3 VIEWS below), in this case “All”

3. Search (see 8 below)

4. Filters (see 10 below)

5. Next to each message is shown the inbox name with an arrow pointing up to indicate outgoing, down incoming. Swiping right marks a message as read, left adds a flag

6. From ellipsis menu there are two options:

a. Edit – advanced search (see 9 below)
b. Select multiple messages (see 11 MULTIPLE ACTIONS below

7. Compose new message (see 2 COMPOSE AND ATTACHMENTS below)

8. Simple message search (on one parameter) – this only applies to the current View, i.e. not all Views are searched. From quick search advanced search can be accessed (see 9 below) where searches can be run outside of the current View

9. Advanced message search (on multiple parameters). Autocomplete is used in the From/to field, suggesting entries from the Address Book – multiple recipients/addressees can be added to this field. Some fields have multiple drop down menus to choose from, e.g. Message Box, Creator etc.

10. Messages can also be filtered using multiple parameters. As in 8 above, this only applies to the current View, i.e. not all Views are filtered

11. In the message list, those messages with associated keywords, deals etc will have the appropriate (coloured) icons displayed in the message summary. The mailbox is also displayed along with an arrow that indicates incoming (down) or outgoing (up) messages

12. The same icons will appear at the top of the message, once opened. Also displayed (in orange) is the mailbox and whether the email is incoming or outgoing. Swiping left or right reveals the following or previous message respectively

13. Tapping any icon at the top of the message will reveal detailed information at the bottom of the message

14. When viewing messages, pinching the screen allows the user to zoom in and out (from 0 to 3x)

15. Having tapped the ellipsis in a message, various options are then available in the drop-down menu as shown

16. When forwarding or replying to emails, message indentations can make the original email chain difficult to read on a narrow screen. These can be removed by first clicking in the “Edit Original” button

17. Rows can then be moved to the left by first aligning the cursor, then

18. From the menu touch the “Indent” icon

2    COMPOSE AND ATTACHMENTS

1. Having tapped the ellipsis in a new message, the message can be saved either in draft form or as a template. Other options are available from this menu, including to add ship details

2. With each message there is the option to send either internally, i.e. within the same organisation, or externally, as a conventional email. The current selection is shown in bold

3. Once complete, the message can be sent with the user’s default delay (see Settings) by tapping on “Send”. Alternatively, from the drop down menu, the user can choose when the current message is sent. If a message is delayed then it can be accessed via “Pending” in Views (see also 3.4 below). The time before despatch is shown and the message can be edited if necessary

4. Images, files and signatures can be added to messages being composed, as can pictures taken using the device’s camera. There is also an option to use plain text or Html (the default for new messages being determined via settings in the web version of CompassAir) – the original format of a message is respected

5. Attachments can be added from other messages, CompassAir filing folders, ship documents and details or from other files on the device

6. Images can be attached either using the device’s camera or from the device’s gallery

7. When forwarding a message with an attachment, an alert message is displayed

8. Attachments are displayed at the bottom of the email, colour coded according to file type

3    MESSAGE VIEWS

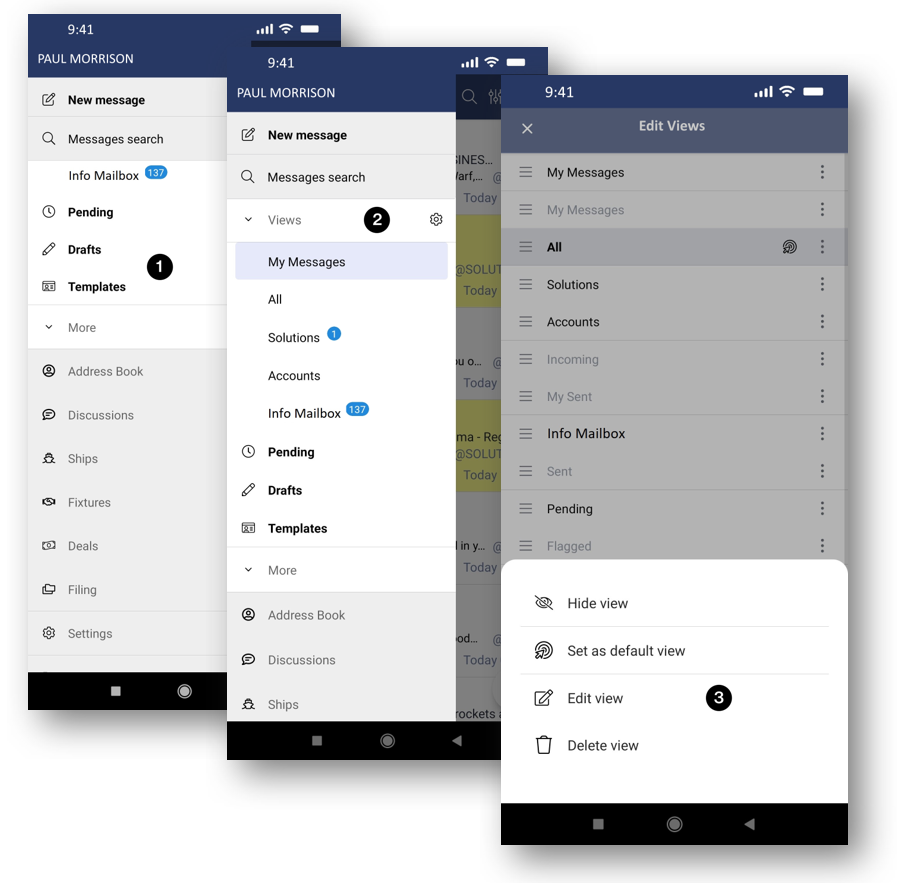
1. From the Messages screen (see 1 MESSAGES above) the Views menu can be accessed, along with, for example, the Address Book, Ships, Fixtures and Settings (see below), scrolling up and down. Views are fully synchronized between the mobile app and CompassAir web. As for the web version, the blue numbers represent the number of additional emails in a mailbox since it was last visited

2. Views can be customised from “Settings”

3. The order in which Views are visible can be changed as well as edited (via the ellipsis, Edit, then by dragging on the three horizontal lines) with any changes synchronized with CompassAir web (i.e. on the desktop version of CompassAir)

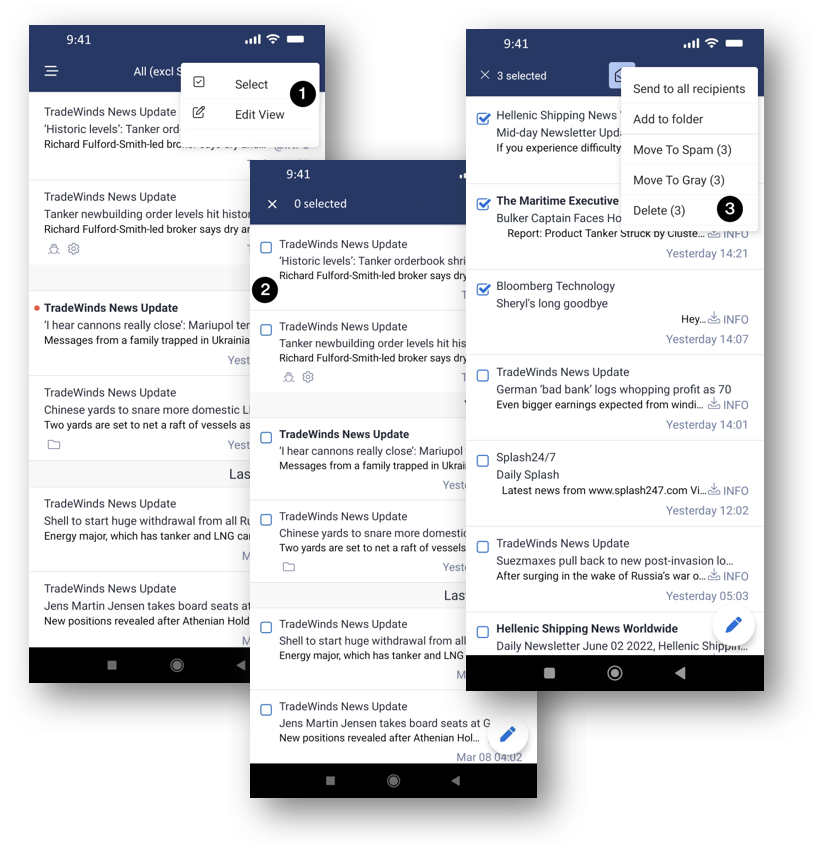
4. Pending messages (see 2.3 above) can be deleted by swiping left on the message in Pending, or right to send the message (a confirmation will then be requested). In Drafts, messages cannot be swiped.

4      ADDRESS BOOK

1. The Address Book is accessed from the Views menu (see 3 MESSAGE VIEWS above). Contacts can be found via the search box

2. Tapping on a contact reveals the full details of that contact, which can then be edited by the user if necessary

3. There are three tabs at the bottom of each contact screen. Tapping on the second tab reveals all messages associated with that contact, both incoming and outgoing

4. The final tab displays the contact hierarchy

5     DISCUSSIONS AND NOTIFICATIONS

1. Send internal messages to team members, departments, or globally: start by tapping on the speech balloon at the bottom of an external message (if it is already coloured blue, this indicates that there is a discussion already taking place “behind” the message)

2. Then add your message to the discussion. Placing an “@” before a colleague’s name will send a notification to him or her (see 4 below)

3. As for 1 above, if a message has a blue speech balloon displayed in the message list, again this indicates that there is a discussion already taking place “behind” the message

4. If push notifications have been enabled for discussions, the alert will be displayed on the Lock Screen (see also the notification below, i.e. as it appears in the web version of CompassAir)

6    SHIPS

1. “Ships” from the Views menu opens advanced search. Some fields have drop down menus from which selections can be made, e.g. Country, Sale Status etc.

2. Tapping “Search” without first adding any parameters opens an alphabetical list of vessels

3. For each ship there is also access, via the tabs, to associated messages, documents and any commercial advices. Tapping the relevant advice copies it to the clipboard

4. On the ship screen from the ellipsis the vessel details can be added to a new message (either abbreviated or with a full description)

7    FIXTURES

1. “Fixtures” from the Views menu opens a search screen. When searching on “Owner”, the Vessel Owner and the Contractual Owner fields are both included in the search

2. From this screen, by tapping on Search without entering text reveals an alphabetical list of Fixtures.

3. Against each fixture there is access to associated messages and documents, via the tabs at the bottom of the screen

8    DEALS

1. “Deals” from the Views menu opens the search screen.

2. From this screen, by tapping on Search without entering text reveals an alphabetical list of Fixtures.

3. Against each deal there is access to associated messages and documents, via the tabs at the bottom of the screen

4. Tapping the ship name takes the user directly to the vessel database where can be seen associated messages, documents and commercial advices

9   FILING AND FILING TREE

1. Messages can be filed by tapping the filing icon which is found at the bottom of each message (accessed quickly via the “eye” icon)

2. To file the message, tap the file icon

3. This will reveal a search field from which can be selected the desired folder

4. In passing, you will see that this message has already been linked to a ship (DHT Amazon) – the association visible through the icon displayed at 1 above

5. Tapping “Filing” from the Views menu opens a list of folders from which a simple search can take place

6. Each folder can be opened and searched individually

7. The icons show the content of the folder – in this example there are both messages and documents

10   SETTINGS

1. From Settings, accessed via the Views menu, the application version can be found, the user password changed, message colours set, whether or not the application remains awake and whether messages that have been read remain visible in the message list

2. For future reference, this User Guide is also accessible directly from the mobile app using the Settings menu

11   MULTIPLE ACTIONS

1. From the ellipsis (see 1 MESSAGES 6 above), actions on multiple messages at the same time can be taken via “Select”

2. Multiple messages are then chosen using the check boxes

3. Once messages have been selected, the actions that can be taken are accessed via the ellipsis. These actions can be to send each selected message to all recipients, or add them to folders, move them to spam, move to grey or to delete them (providing the user has been given prior authority to used these commands)